Open Bidding is Google’s server-side header bidding solution, offered to publishers who use Google Ad Manager (DFP) for ad serving. It allows publishers to expose their ad inventories to other third-party ad exchanges so that the additional demand partners can compete for the impressions in a unified real-time auction.
Through its ad server, Google enables publishers* to implement Open Bidding, sell their remnant ad impressions, and boost ad revenue. To help you get started with Open Bidding, we’ve put together this step-by-step guide.
*Please note that you need Google Ad Manager 360 account to run Open Bidding on your ad inventories.
Table of Contents
Getting Started with Open Bidding
Although setting up Open Bidding in Google Ad Manager is easy to get along with, there are a few challenges a publisher has to face before implementing the bidding feature. If you have access to Google Ad Exchange, you must sign new contracts with third-party ad exchanges, get Google-enabled licenses, etc.
If you don’t have an AdX account, you first need to get an account with Google Ad Exchange and link it to your Google Ad Manager as a primary ad exchange account. And to do so, you’ve to,
- Sign in to your Google Ad Manager account.
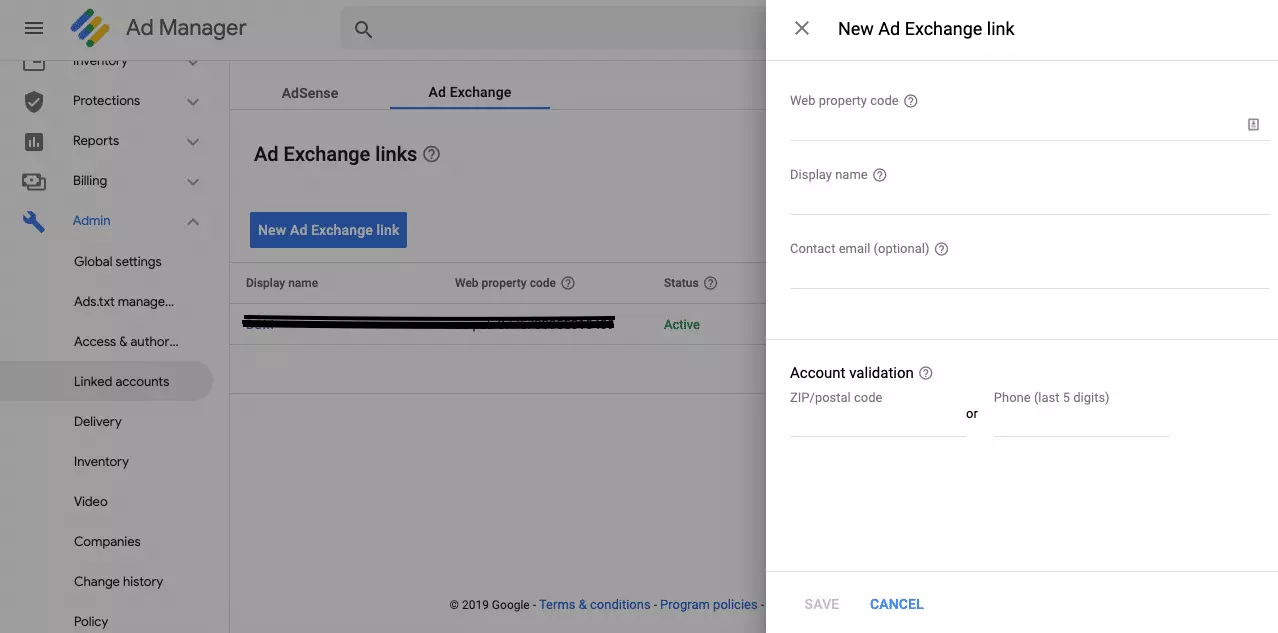
- Click Admin > Linked Account > New Ad Exchange Link. Enter the web property code, i.e., Publisher ID associated with your ad exchange account.
- Enter a display name you’ll select when creating an Exchange line item. Also, enter the email address you used while signing up for Ad Exchange.
- Enter the validation details and Save.
That’s it. However, the main challenge is to enable Open Bidding in the ad server. There’s a list of a few tasks that a publisher and exchange partners have to perform to get this server-to-server bidding solution.
- Publishers and their ad exchange partners (except Google’s ad exchange, of course) have to establish a contractual relationship with each other.
- Link a primary ad exchange to the Ad Manager account as discussed in the last paragraph, and ensure it is set as “default for dynamic allocation”.
- Get your Google account manager to sign an open bidding addendum with you. It consists of revenue share and payment terms. According to AdAge, you’ve to pay 5 percent for every transaction.
Sidenote: Note that exchanges you want to work with (add to Open Bidding) must have a separate contractual agreement with Google. , some exchanges share 15% of their revenue with Google to be an exchange bidding partner.
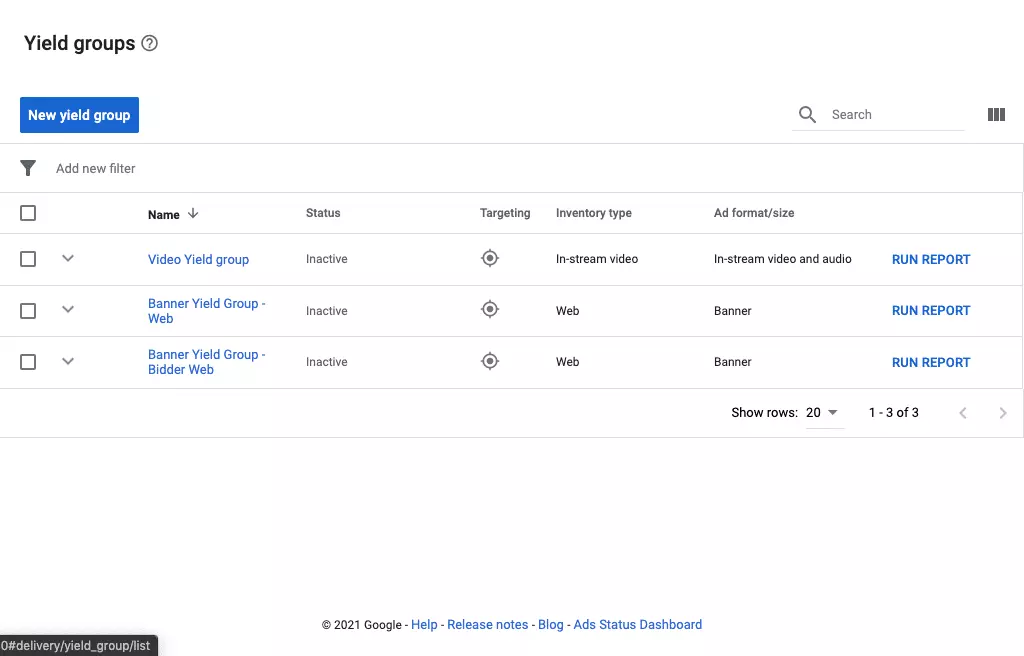
If you’ve completed the above prerequisites and got approval from Google, you’re ready to set up Open Bidding in the Ad Manager. For publishers who want to verify if Open Bidding is enabled or not, you can navigate to Delivery > Yield Group*.
*Yield Group and Web targeting options are available in the Ad Manager (DFP) for the publishers whose account has been approved by Google for the Open Bidding feature.
How to Setup Open Bidding in Google Ad Manager?
To make your demand partners available to compete for your ad impressions, a publisher has to enable them in the Google Ad Manager manually. Follow the below steps to allow demand partners to participate in Open Bidding.
Step #1 – Enable Demand Partners for Open Bidding in Ad Manager
- Click on Admin > Companies. Select the appropriate advertising partner, i.e., Advertiser, Ad Network, Agency, House Agency, etc.
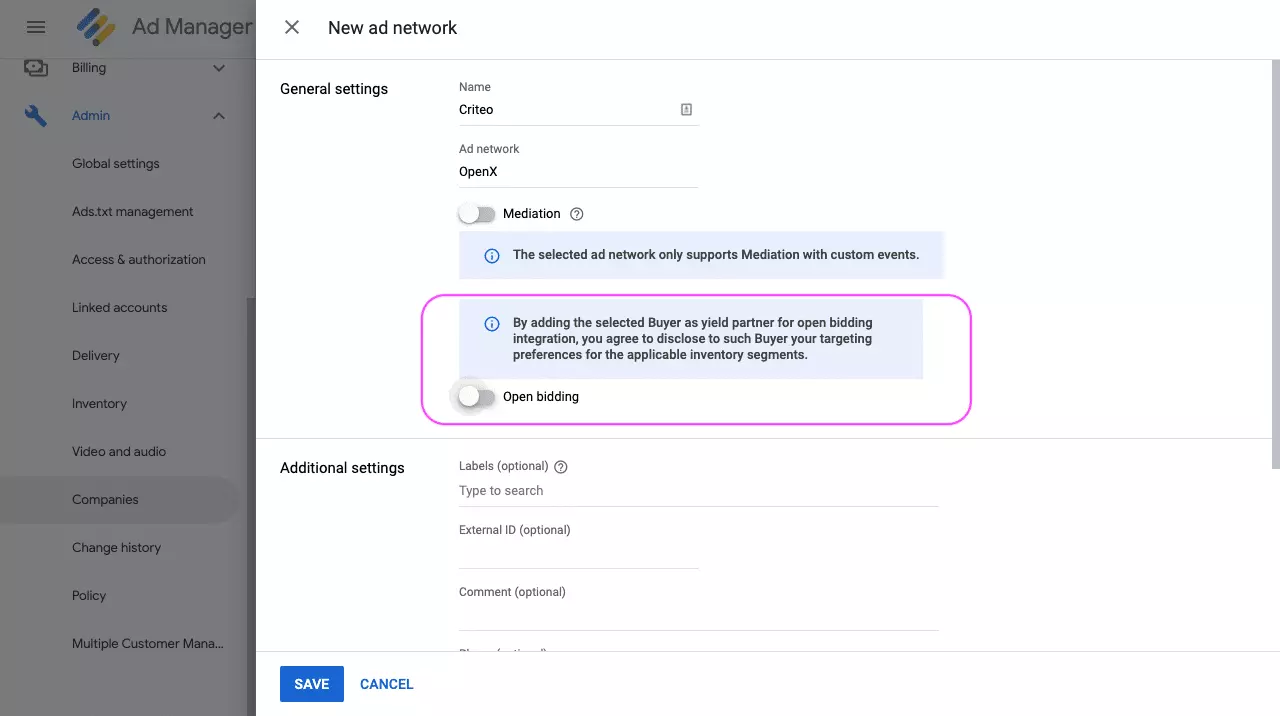
- Suppose you are working with Criteo (i.e., an ad network). So, to enable it for OBDA, click on Ad Network. Then, enter a name for the network, e.g., Criteo OBDA.
- Then, tick the “Enable for open bidding”. A pop-up will open. In the pop-up, you have to click on Acknowledge to enable the ad network (here, Criteo) to bid on inventory through exchange bidding and save the settings.
Now, the next step is how to create different yield groups in the Ad Manager.
Step #2 – Create Yield Groups
A yield group is simply a group of Google’s AdX (always included as a yield partner by default) and third-party exchanges or networks. It allows publishers to specify which ad inventories they want to sell with Exchange Bidding and to whom.
- Go to Delivery > Yield groups > New yield group.
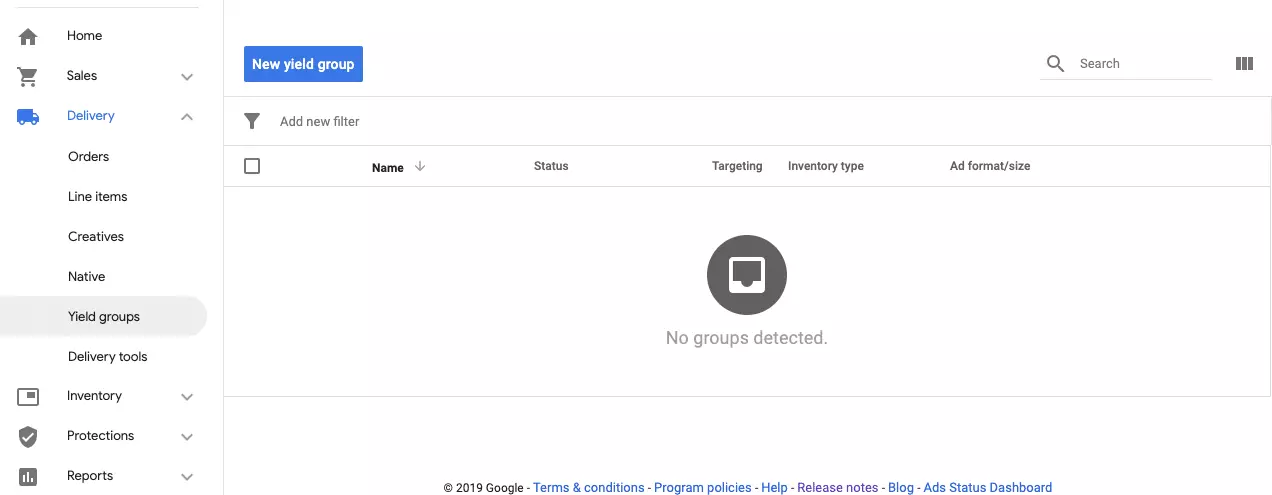
- Then, enter a name for the Yield Group, such as SSP Yield Group.
- Select the ad format you want and the yield group support. Here, you can select any of the following – Banner, Interstitial, Native, In-stream video and audio, or Rewarded.
- Select the Inventory type (i.e., Web or Mobile app) from the drop-down menu. Then, define the ad sizes in the next field, i.e., 300×250, 728×90, 300×600, etc.
- After filling in the above details, define your targeting options in the next field.
- Then, Save and Activate.
Note: Native ads cannot be served through Open Bidding.
In addition to Google Ad Exchange, publishers need to add third-party yield partners to make them compete for your ad inventories that have been targeted. Follow the below steps to add a third-party partner and enable it for exchange bidding.
- Go to Add yield partner > Select a yield partner. And select the yield partner from the drop-down menu. Click Create a new yield partner.
- Then, select the Integration type “Open Bidding”.
- After that, you can select the Operating System you wish to target, i.e., iOS or Android. This step is visible only for the “mobile app” yield group inventory type.
- Enter the Default CPM value to set the price manually for ad networks. Or you can select Dynamic CPM to set the CPM for ad networks automatically. However, to do that, you must enable Automatic data collection while adding an ad network.
- And, then, Save.
Note: A publisher can add up to ten third-party yield partners to a single group.
How to Check the Performance of Open Bidding?
As we know, one of the best features of Google Ad Manager is the reporting feature that allows publishers to track the performance of ad campaigns. In the Ad Manager, you can check how Open Bidding is performing by pulling out reports with detailed statistics.
Simply go to Reports > New report > Historical. Enter all the required details, and then select the Dimensions as Yield Group. For Metrics, you can select any of the following.
- Yield Group Bids.
- Yield Group Auctions Won.
- Yield Group Estimated Revenue.
- Yield Group Estimated CPM.
- Yield Group Successful Responses, etc.
Here, you can select multiple yield groups, or you can also check the performance of individual partners by following the below steps.
Reports > Queries > Historical > Yield Groups. After that, select the Yield Group and then select the partner for which you want to analyze the performance.
What’s Next?
Although Open Bidding happens on the server side, a publisher has to pay a certain percentage of revenue share to Google since Google manages it. Ad exchanges willing to participate cannot see how much Google AdX bids when it wins an auction, and Google controls the auction and is also the buyer (AdX) here.
So, it’s better to experiment with Open Bidding and header bidding and see the results. If you want to understand what’s the difference between header bidding and open bidding and which is the better choice, then here’s your reference. Let us know if you have any questions in the comments.


