
Header Bidding has seen a meteoric rise in the past few years. Most publishers prefer to implement it with the help of third-party service providers (also known as, header bidding providers). If you do so, they’ll give you a piece of JS that you have to place on your pages, this, in turn, will initiate the header bidding process. But there’s a good chance for you to use WordPress as your CMS and running header bidding on WordPress sites can be a bit different depending on your preferred way of implementation.
Just like all the other CMS out there, WordPress has its own ways of accessing the website’s source code. In this article, we’ll see what are available ways for you to implement header bidding on the WordPress site.
Most of the websites consist of a combination of HTML, javascript, and CSS. The codes for header bidding are also javascript. To implement header bidding on a WordPress site, you have to add the header bidding code (aka script) to the head of your web pages.
Table of Contents
What is the Head of a page?
It won’t be surprising if you misunderstand the term ‘head’ with ‘header.’ The head of your page consists of the code between the <head> and </head> tags. This code contains the page’s title, meta data like date, author name, etc., links to CSS files, and other scripts to help third parties interact and understand the webpage. The Header Bidding script also works as a script for third parties, and it goes between the <head> and the </head> tags.
So what is a Header?
Unlike the head, which is invisible to the visitor, the header is a prominently visible part of a page. All the navigational options and the website logo appear on the header of the page. Below are the examples of the header and the head.

Sidenote: Despite the difference, you’ll see the word ‘header’ and ‘head’ being used interchangeably all across the internet; the above demarcation is there to make sure you do not get confused.
How is Header Bidding Implemented on WordPress Site?
The implementation takes place in two steps. In the first step, we’ll add the code and in the second step, we’ll add the meta tags to your site.
Step 1
First, you need to take the javascript code from your managed header bidding provider and paste it at the beginning of the <head> tag. It’s a small piece of code, and it looks like this:
<script type=”text/javascript” src=”https://go.automatad.com/geo/XxXxXx/afihbs.js” async></script>
Step 2
Meta tags will also go into the <head> of your site. They’ll be added to every page as per your site layout. They’ll help the script to understand where the traffic is coming from (homepage, section page, article page, search page, etc). By understanding the layout, the script will load only the relevant ad containers/units, making the delivery of the right ads without any delay.
Meta tags should look like this: <meta name=”atdlayout” content=”homepage”>
Step 3 (Optional)
Depending on the additional functionalities and the way your header bidding service provider’s implementation process, you may need to add a few more pieces of code to your site. For example, lazy loading, additional unique ad units, etc. need a few additional scripts.
How is the code added to the head?
There are multiple ways to add the ad codes to your site’s head or any other parts of your site. You can do it manually, or by using plugins made to edit the header and footer of WordPress sites, or by using ad management plugins.
- Manual Method: You go directly into the folders and files of your website and edit them to add the codes.
- Header/Footer Plugins: These plugins are made to inject codes to your site, you can use them to insert the header bidding codes as well.
- Ad Management Plugins: These plugins will not only help you with code insertion but they’ll provide you a host of other features to manage the ads on your site. For example, creating ad units and placements, pacing the ads, integrating monetization partners, etc.
Manual Method
It is the recommended method to add the codes to your site. The reason behind the recommendation is that adding plugins can make your site slow. Additionally, sometimes plugins can be complex to use, they can have bugs that can put your site at risk, and occasionally, you might even have to pay for them. But manual implementation also requires a fair amount of caution because even a small mistake can cause your site to malfunction.
You need a child theme before you add the code to your site. A child theme is required because if you edit the main theme, the changes will be lost once the theme is updated. There are chances that your developer has already provided you a child theme, but if not, you can create it yourself. There are many plug-ins available to do so; Child Theme Configurator is a popular option. You can remove the plug-in after the child theme is created.
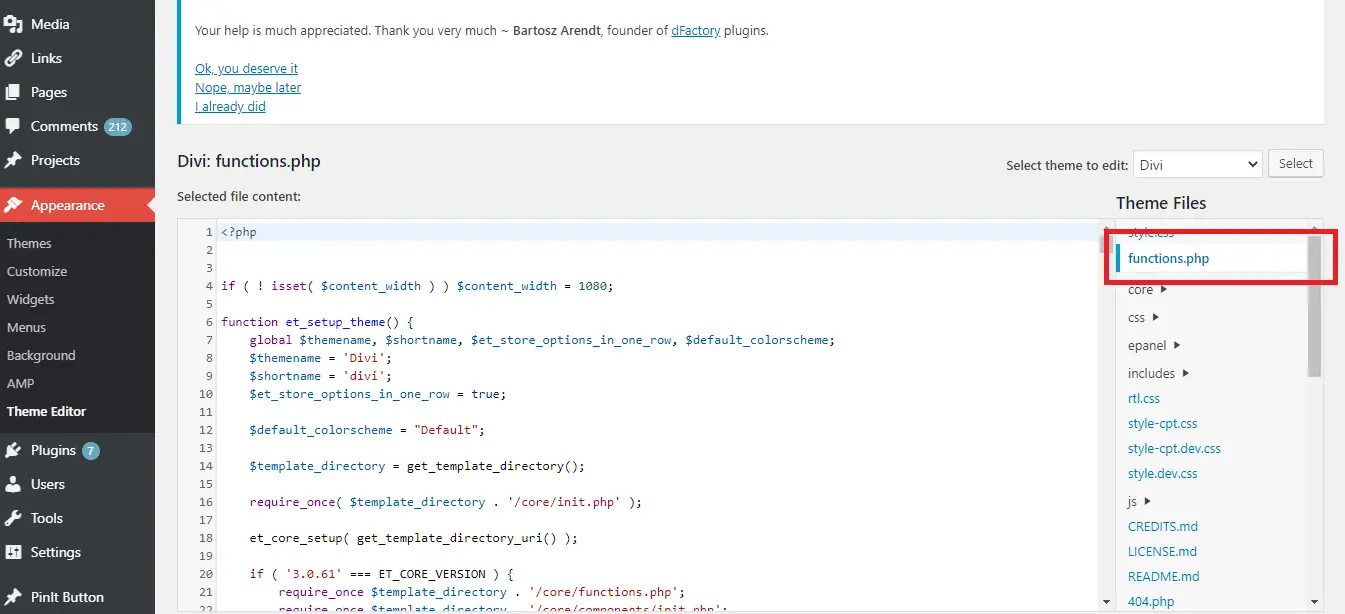
Once done, you can add the codes to the Functions.php (or Header.php) file of your child theme by going to Appearance > Theme Editor from the WordPress Dashboard.
Header/Footer Plugins
There are tons of plugins to insert header or footer scripts in your site. Using them is simple and straightforward. The Insert Headers and Footers plugin by WPBeginner is quite popular for the job. It has more than a million active installs on WordPress. Once you install it on your site, it’ll give you text fields to add the scripts to your site’s header, body, and footer. You can add the scripts in the respective fields, hit the ‘Save’ button and you are good to go. It’ll save you from going into the source code of your site.
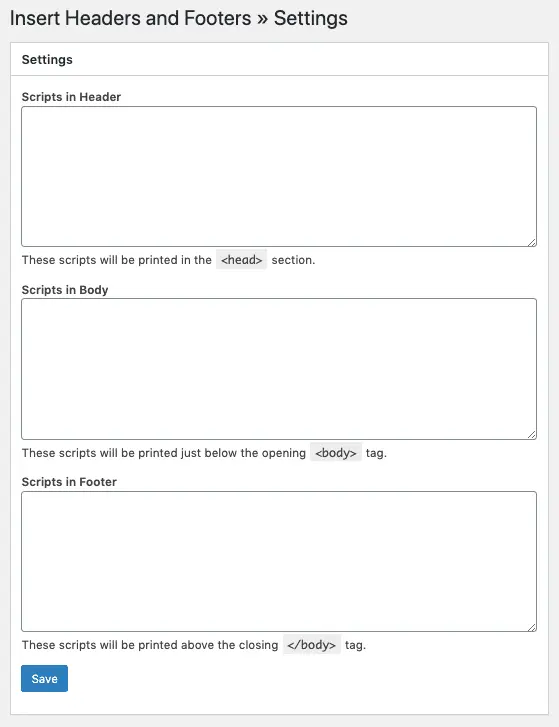
Please remember that you’ll find the plugin in the ‘Settings’ menu of your site. As we mentioned above, the header bidding script should go under the “Scripts in Header” or <head> section.
Ad Management Plugins
We recommend using an ad management plugin for header bidding only if you are already using one on your site. If you are facing problems with the manual method or the header/footer plugin then it’s best to take the help of your header bidding provider.
Sidenote: Why don’t you need an ad management plugin? When you implement header bidding on WordPress site via a provider (or by yourself), you need to integrate an ad server (Google Ad Manager), which is far better than a plugin that tries to imitate an ad server. Even if you aren’t familiar with GAM, you don’t have to worry. Managed header bidding solution providers typically take care of the server setup. So, all you need to do is — placing scripts on the pages. In case you already have a GAM account, just give them the access and they’ll take care of the setup.
So, for an explanation, let’s assume you’re using an ad management plugin. We’ll use the Advanced Ads plugin here, but you can use the plugin that is already installed on your site:
Step 1
- Go to the Plugin from your WordPress Dashboard
- Click Ads > Create New Ad
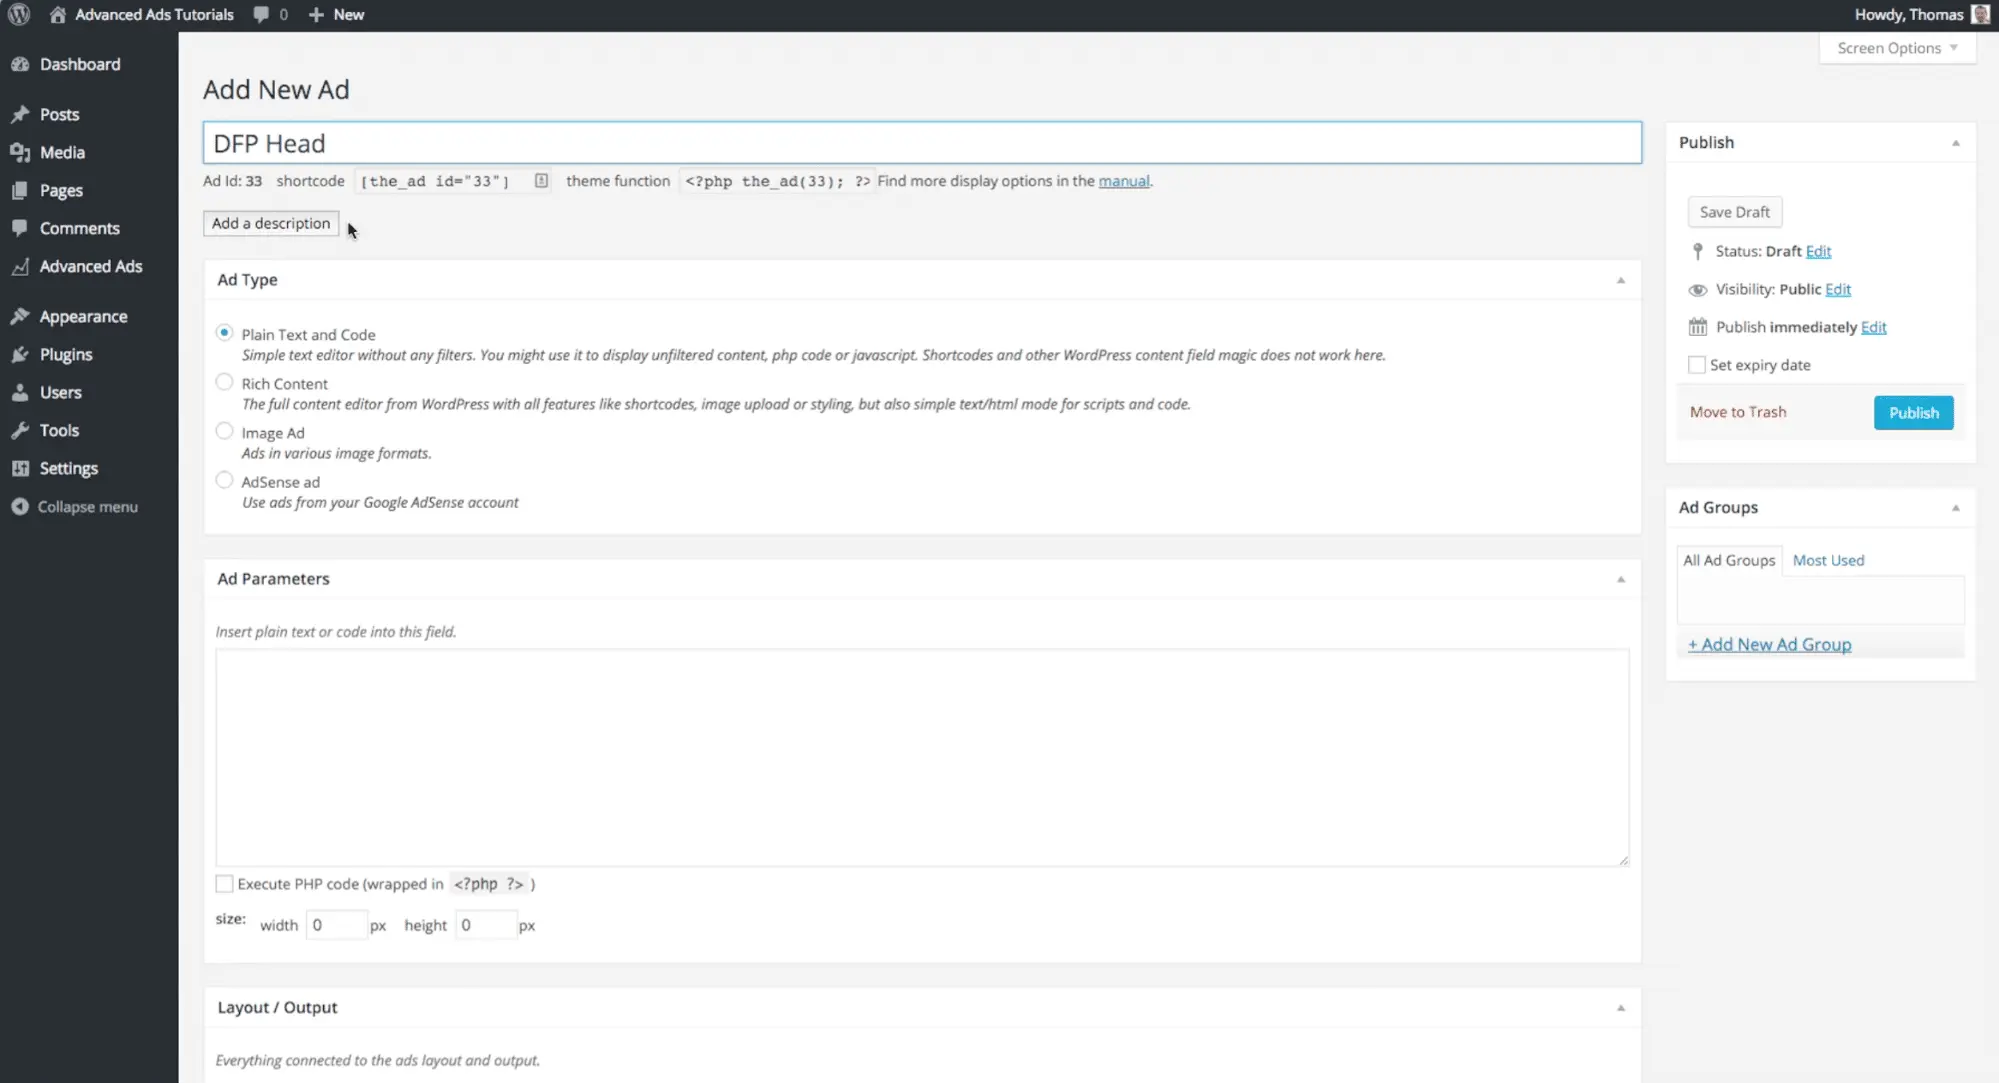
- Give a title to the ad and set Ad Type as “plain text and code”. In the Ad Parameters field, you’ll add the main javascript header bidding code (the one which we saw earlier: <script type=”text/javascript” src=”https://go.automatad.com/geo/XxXxXx/afihbs.js” async></script>)
- Update/Publish.
All the other settings like “Layout/Output”, “Display Conditions”, “Visitor Conditions” are optional while adding the script and it’s likely that you’ll not need them because this code won’t be a visible part of the website. Conditions will be used when you’ll be setting up ads only for specific pages/segments on your site.
Step 2:
- Create a <head> Placement
- Create a new group by going to Groups > Add New Ad Group
In this stage, you have created a place in the website header to display the ads. You can create other placements as well, as shown in Stage 4. You have also created an ad group. We use ad groups just like we use categories and tags to group our posts on WordPress. They can later be used to set the pacing of the ads.

Step 3:
- Create the body tag by going to Ads > Create New Ad
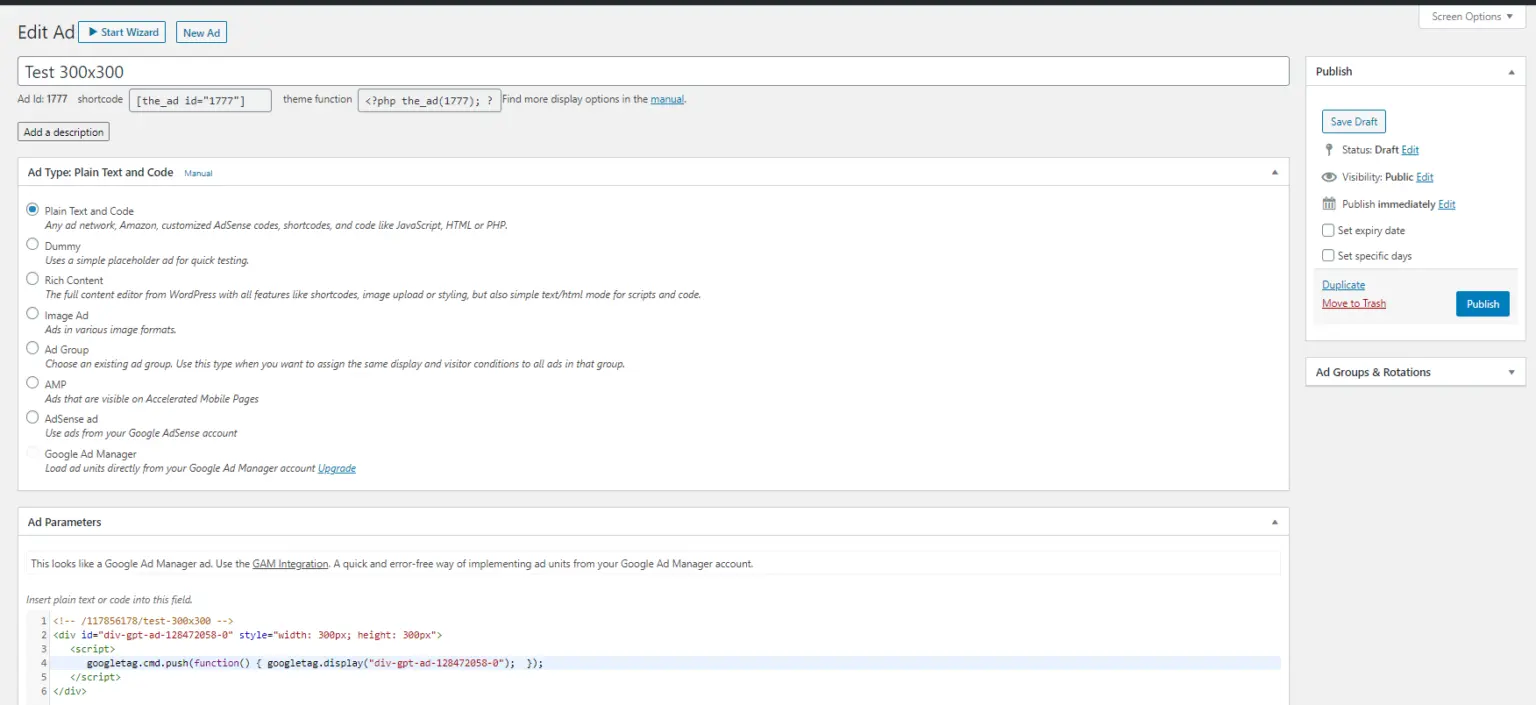
- Paste the body code (ad codes) in the Ad Parameters section. These are the ad sizes you want to run on your pages. Get the codes from your provider.
- Select the Ad Group created in the last step from the panel on the right side.
Step 4:
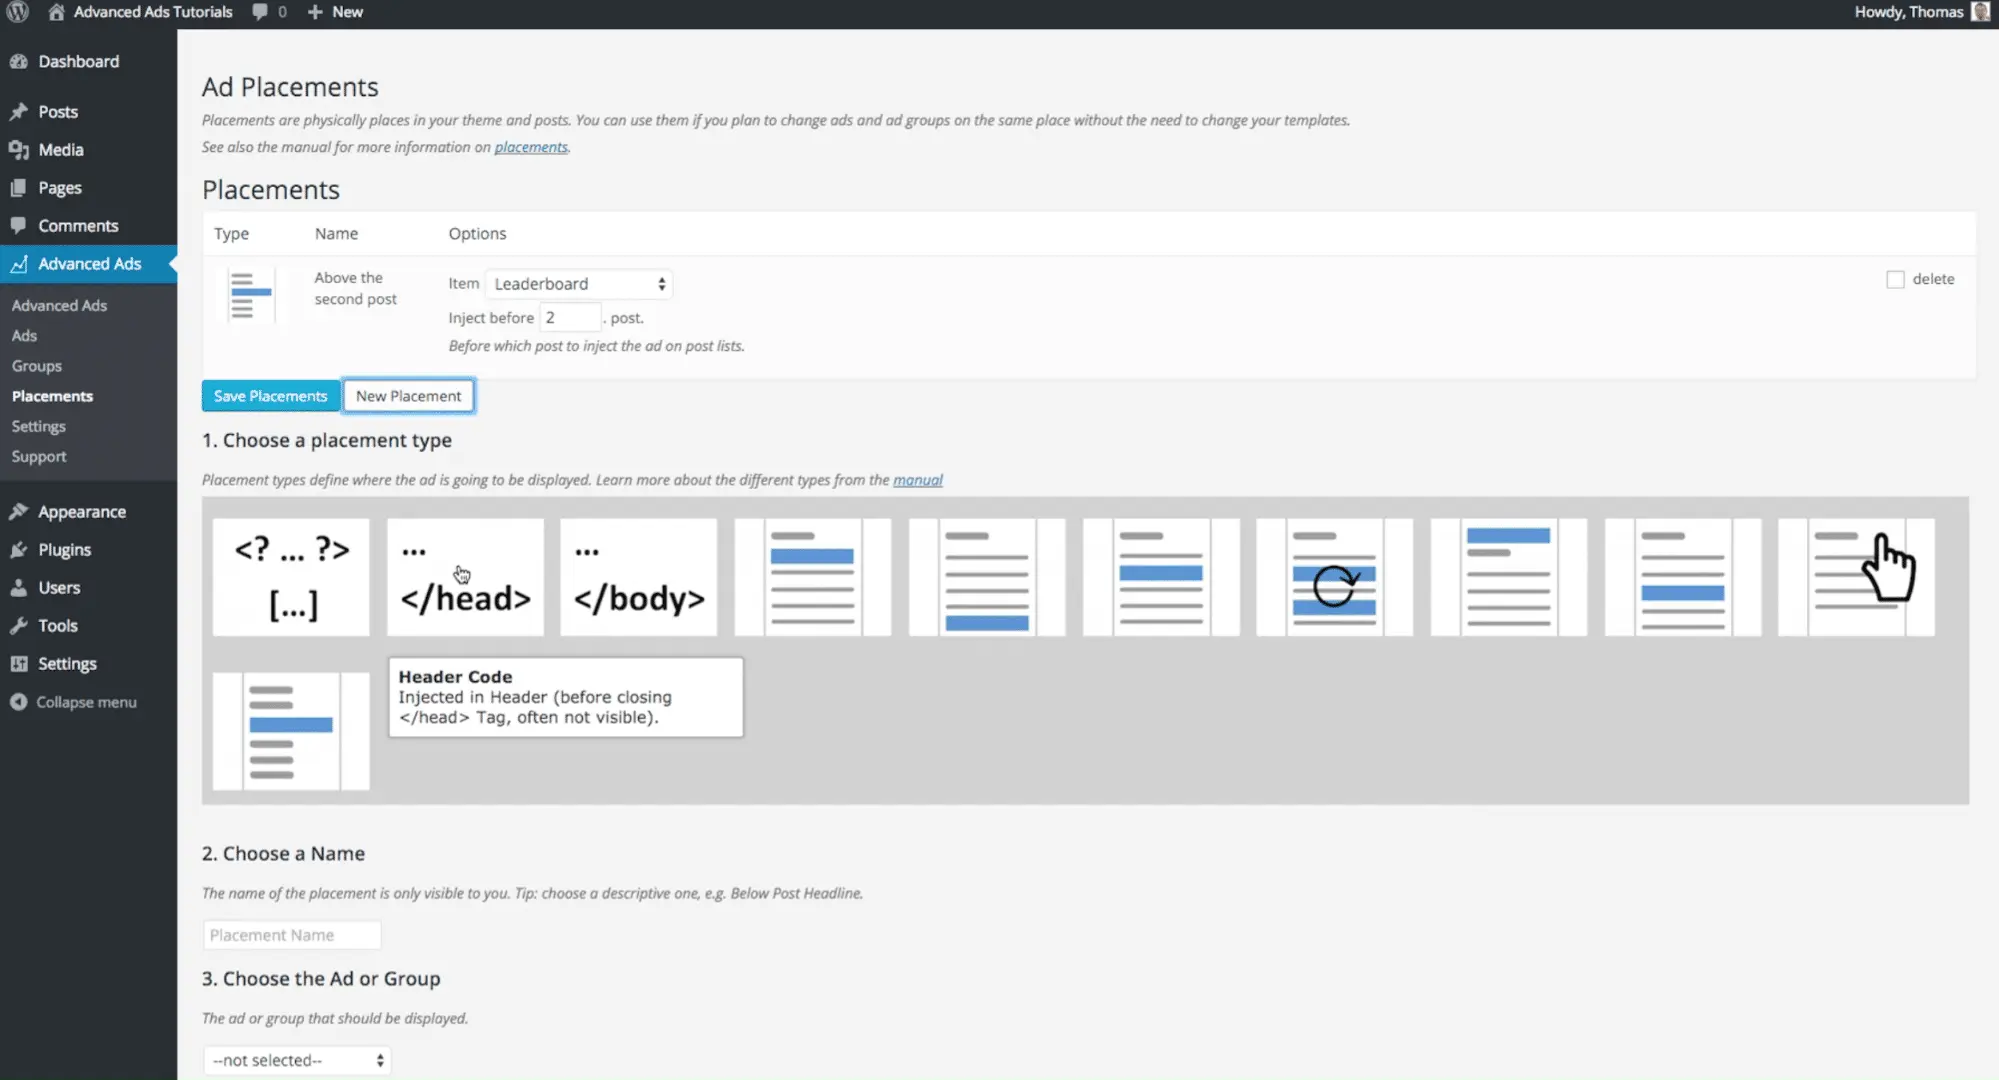
Just as we selected the <head> placement in Step 2, you can choose other positions and repeat the same process. You have placements like ads before the content, after the content, inside the content, sidebars, above the headline, footer bar, etc.
This is just an overview and based on the ad plugin you use, you can refer to the respective documentation for detailed steps. That being said, we’ll cover the implementation via ad management plugins in a separate post soon (with screenshots and explanation). Sign up for our newsletter to keep up.
What else?
These are some tips for a fluent implementation.
- Add your header bidding partner to the Ads.txt file for safety from ad frauds.
- Try the ads on a test page first to check how they are rendering.
- Use meta tags for homepage, sections, articles, etc. for proper targeting.
What’s Next?
Starting header bidding on a WordPress site may sound tricky, but it isn’t. Having expertise in coding will make the task much easier. But many publishers may find it difficult to deal with the technicalities. If you face any hiccups, reach out to us or let us know your questions in the comments. Once the integration part is complete, the ads will start to render.